Showing posts with label Raspberry Pi. Show all posts

Thursday, July 7, 2016

Raspberry Pi Weather Info

Hi,

In this post I will show how to create a weather info station within an hour. The end result looks like this:


The used components:

- A Raspberry Pi (obviously).

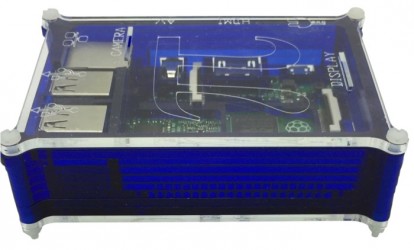
- Very handy casing (8, 95 euro).

- A Keyboard (general application of course), (24,95 euro)

- A TFT screen (12,95 euro)

Installing
I got the TFT screen working by performing the following steps: http://www.circuitbasics.com/setup-lcd-touchscreen-raspberry-pi/


Upload a html file with the following contents:


Upload the file to: /var/www/

Make sure to give it execute permissions!

Then boot the Pi, run the LX terminal and type in (using the keyboard):
  epiphany-browser localhost/weer.html (or whatever name you gave the html file).

btw; I still need to find a way to turn of the screen saver..

Saturday, June 11, 2016

Remote controlled car with Raspberry Pi (piborg) and HC-SR04 ultrasonic sensor (to detect walls and stop car)

I this post I will show how to build a remote controlled car with your Raspberry Pi that will stop whenever it encounters a wall at a predefined distance. The result will look like this:

The car looks like this in detail:

Components


Smart buggy 16 euro.

Two additional wheels, that I glued to the plastic board.
PIBORG - PICOBORG V2 - MOTOR CONTROLLER, 13 euro.

Triborg, 9 euro.

The ultra sonic distance sensor, HCSR04, 2,50 euro.

Wiring was done as described on the internet. The car is remote controlled via telnet using Putty.

Code

The code below is executed. This was tricky because the key listener needs to be non blocking. Once I found one that is non blocking. Its just a matter of using keys, I, J, K, L for steering the car. The distance sensor checks for distances less than 30 CM. The motor is turned off when this happens.

import sys
import select
import tty
import termios
import contextlib
import time
import RPi.GPIO as GPIO
GPIO.setmode(GPIO.BCM)


#used by the distance meter
TRIG = 23
ECHO = 24

GPIO.setup(TRIG,GPIO.OUT)
GPIO.setup(ECHO,GPIO.IN)

#used by the piborg
# Set which GPIO pins the drive outputs are connected to
DRIVE_1 = 4
DRIVE_2 = 18
DRIVE_3 = 8
DRIVE_4 = 7

# Set all of the drive pins as output pins
GPIO.setup(DRIVE_1, GPIO.OUT)
GPIO.setup(DRIVE_2, GPIO.OUT)
GPIO.setup(DRIVE_3, GPIO.OUT)
GPIO.setup(DRIVE_4, GPIO.OUT)

# Map current on/off state to command state
dInvert = {}
dInvert[True] = GPIO.LOW
dInvert[False] = GPIO.HIGH

# Map the on/off state to nicer names for display
dName = {}
dName[True] = 'ON '
dName[False] = 'OFF'

# Function to set all drives off
def MotorOff():
GPIO.output(DRIVE_1, GPIO.LOW)
GPIO.output(DRIVE_2, GPIO.LOW)
GPIO.output(DRIVE_3, GPIO.LOW)
GPIO.output(DRIVE_4, GPIO.LOW)

def MotorOn():
GPIO.output(DRIVE_1, GPIO.HIGH)
GPIO.output(DRIVE_2, GPIO.HIGH)
GPIO.output(DRIVE_3, GPIO.HIGH)
GPIO.output(DRIVE_4, GPIO.HIGH)


def afstand():
time.sleep(0.2)
GPIO.output(TRIG, False)
GPIO.output(TRIG, True)
time.sleep(0.00001)
GPIO.output(TRIG, False)
while GPIO.input(ECHO)==0:
pulse_start = time.time()

while GPIO.input(ECHO)==1:
pulse_end = time.time()

pulse_duration = pulse_end - pulse_start
distance = pulse_duration * 17150
distance = round(distance, 2)

return distance
#distance

def isData():
return select.select([sys.stdin], [], [], 0) == ([sys.stdin], [], [])


old_settings = termios.tcgetattr(sys.stdin)
try:
tty.setcbreak(sys.stdin.fileno())


while 1:
if (afstand() < 50):
MotorOff()


if isData():
c = sys.stdin.read(1)
print str((c))
if c == '\x1b': # x1b is ESC
break
elif c == 'i': #Vooruit
MotorOn()
elif c == 'k': #Stop
MotorOff()
elif c == 'j': #Links
print 'links'
if ((GPIO.input(DRIVE_1)) & (GPIO.input(DRIVE_4))):
print 'aan het rijden'
GPIO.output(DRIVE_1, GPIO.LOW)
GPIO.output(DRIVE_2, GPIO.LOW)

time.sleep(0.1)
GPIO.output(DRIVE_1, GPIO.HIGH)
GPIO.output(DRIVE_2, GPIO.HIGH)
else:
GPIO.output(DRIVE_3, dInvert[GPIO.input(DRIVE_3)])
GPIO.output(DRIVE_4, dInvert[GPIO.input(DRIVE_4)])
elif c == 'l': #Rechts
print 'rechts'
if ((GPIO.input(DRIVE_1)) & (GPIO.input(DRIVE_4))):
print 'aan het rijden'
GPIO.output(DRIVE_4, GPIO.LOW)
GPIO.output(DRIVE_3, GPIO.LOW)

time.sleep(0.1)
GPIO.output(DRIVE_4, GPIO.HIGH)
GPIO.output(DRIVE_3, GPIO.HIGH)
else:
GPIO.output(DRIVE_1, dInvert[GPIO.input(DRIVE_1)])
GPIO.output(DRIVE_2, dInvert[GPIO.input(DRIVE_2)])
finally:
print("stop")
termios.tcsetattr(sys.stdin, termios.TCSADRAIN, old_settings)

Sunday, May 29, 2016

Internet of Things, my first "thing"

After watching this very nice episode of Tegenlicht about smart cities I got inspired to start sharing my experiences with my Raspberry Pi. I started playing with the Pi about 2 years ago and tried a most of the common sensors (temp, light, sound, movement, etc). The coming period I will start sharing my experiences. The is the Tegenlicht episode on smart cities, higly recommended!


By the end of this post we are able to view the temperature on a webpage which can be viewed with your computer or any mobile device of course.

The required hardware components:

- Raspberry Pi 2 or 3.. (35 euro)

- Wifi adapter
- SD card
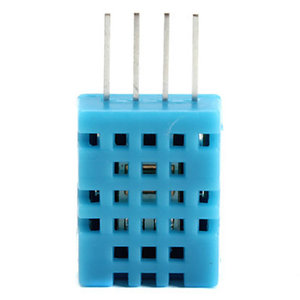
- DHT11 Temparature sensor (2,45 euro)
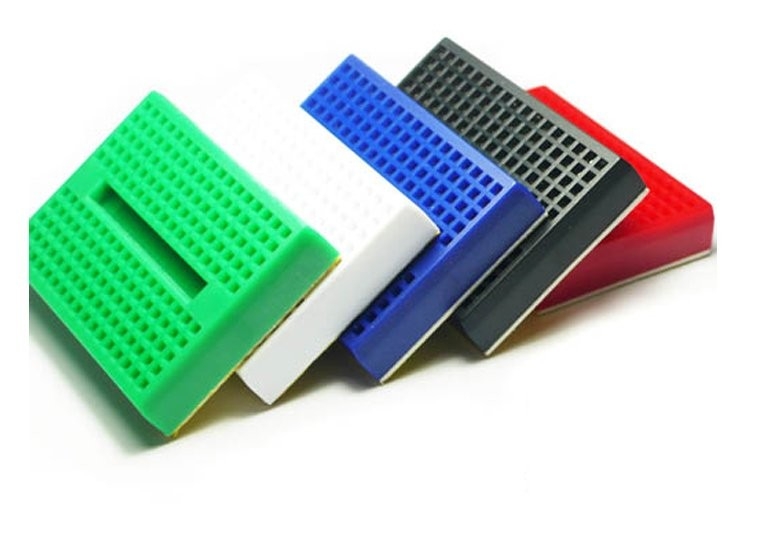
- mini breadboard (1,55 euro)
- 10 Kohm resistor (0,10 euro


Regarding the hardware purchase; I like to buy the Pi at SOS solutions because this guy makes sure the peripherals are high quality. You can get the Pi for a slightly lower price elsewere but he makes up with good service 7 days a week!

I buy all the componts at vanallesenmeer.nl. This shop offers the products at the lowest price possible and delivery has always been on time.  

Software used:
- Putty for telnet session
- FileZilla to transfer the files with FTP
- Notepad++ to edit / write the code. 

Putting it together:

This shows how I wired the DHT11:


It looks like this in real life:


The software:
We install the ADA fruit DHT library for convenience as instructed.
  
sudo apt-get update
sudo apt-get install build-essential python-dev
sudo python setup.py install

Now we can create a file with the following contents, just like the example that has been provided:

#!/usr/bin/python

import Adafruit_DHT
sensor = Adafruit_DHT.DHT11
pin = 18
humidity, temperature = Adafruit_DHT.read_retry(sensor, pin)

if humidity is not None and temperature is not None:
print 'Temp={0:0.1f}*C Humidity={1:0.1f}%'.format(temperature, humidity)
else:
print 'Failed to get reading. Try again!'

When you place this file in the /var/www/ folder next to a php file with the following contents you will be able to disply the temperature on a webpage.

<html>
<?php
echo exec('sudo python ./simpletest.py')
?>
</html>

You need to make the www-data group owner of the file:

sudo chown www-data temp.php

When you open the page in a browser the result looks like this. Mind its hot in the closet where the Pi resides..

Thursday, May 19, 2016

Raspberry Pi losing Wifi connection

I have a Raspberry Pi connected to my printer to enable wireless printing. However my Pi was losing its Wifi connection. I read on the internet that I should turn off Power Management by creating a file:
    sudo nano /etc/modprobe.d/8192cu.conf

The following code should be added.
# Disable power management
options
8192cu rtw_power_mgnt=0 rtw_enusbss=0 rtw_ips_mode=1

With the following command you can check whether power management is disabled:
 
sudo iwconfig wlan0

Will test it for a while and update you with the results..